Today's tutorial will be a bit more in-depth, as we will discuss how to make a half square triangle block, and then we'll layout and piece the block itself.
Materials:
8 3.5" squares of Color A
8 3.5" squares of Color B
*note* these are the essential materials for each block, so you can cut several blocks worth of fabric at once to save time!
How to make a Half Square Triangle Block:

Cut 8 squares of each color. Using your lightest colored squares and a water-soluble pen (I always use a mechanical pencil. I used a water-soluble pen once and marked all of my lines for a quilt and by them time I got around to sewing them, the lines had all disappeared! I have not had a problem with my pencil marks - since we are going to cut on this line you shouldn't see anything through the fabric), draw a diagonal line from corner to corner.

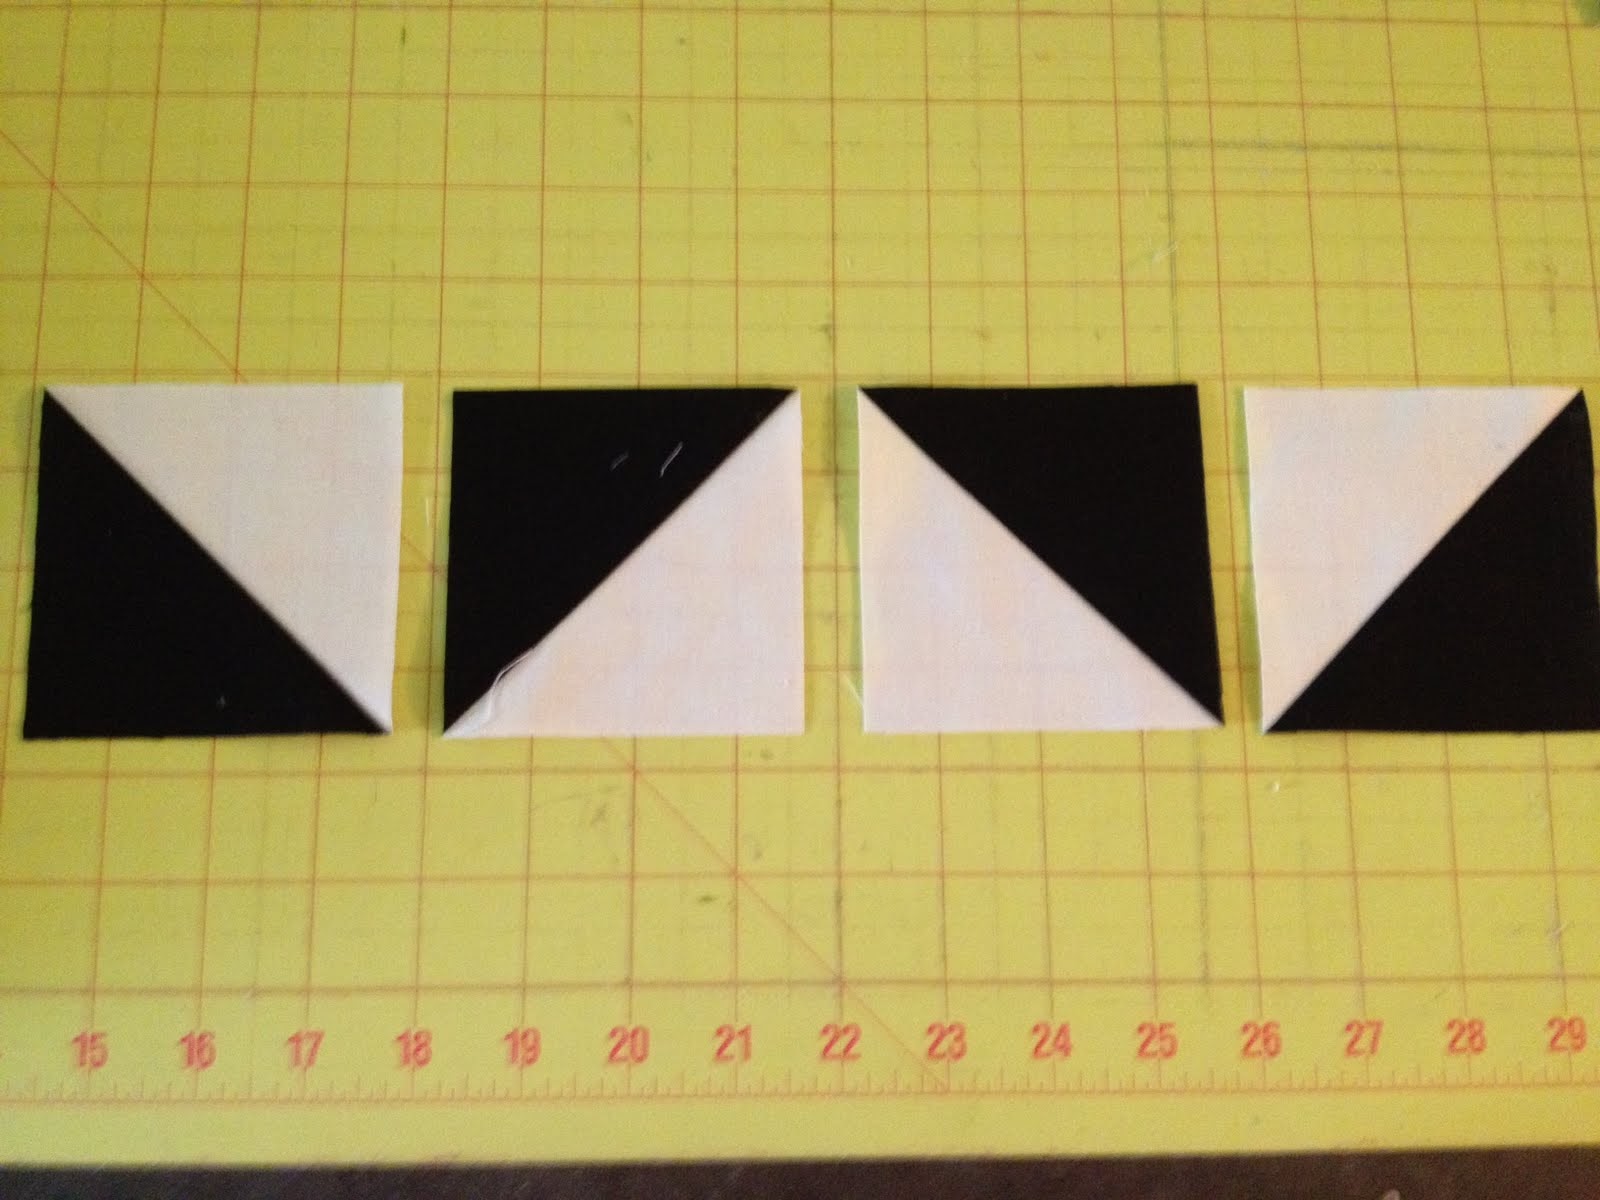
Place a color A square on top of a color B square with your diagonal line facing. Using a scant 1/4" seam allowance, sew a line 1/4" away from your marked line on each side of the line. Now, using your clear acrylic ruler and your rotary cutter, cut carefully on the line. You should now have 16 blocks. Press your squares open, pressing your seam to the darker color.

Now it is time to square up your blocks. I like to use a square ruler to do this, but you can also do it with a regular clear ruler. Place the 45 degree line on your line between color A and color B, and trim your square down to 2.5" Repeat for all 16 blocks.
Now it is time to layout the block! Yay - this is the fun part! Follow these pictures to show you how to layout each row.

ROW 1

ROW 2

ROW 3
ROW 4
Now sew your blocks together as you laid them out. Press your seams, alternating directions (I always press odd numbered rows to the left, and even to the right.)
Now lay out your rows - another picture for you to make sure you have them laid out correctly and didn't flip anything while sewing or ironing!

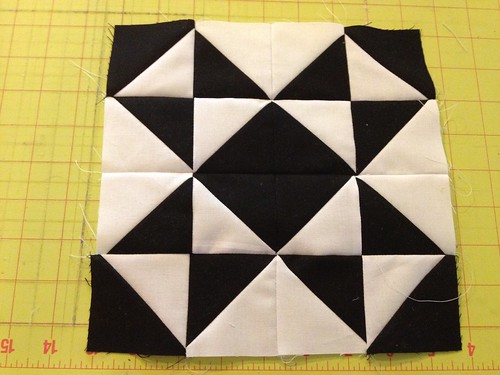
Sew your rows together, and ta-da! A finished block!
Yay you! One block done, and only 71 more to go! :)
Come back next Monday to make Block 2! Please add your blocks to our flickr group!
Block 1 finished. I added it to the flickr group.
ReplyDeleteDoes this quilt block have a name? I's like to do it as a group project in our quilting group, and it needs a name. ;) Thanks!
ReplyDelete